Child-Led Solar System Exploration

I’ve been greatly influenced by both Montessori and Reggio Emilia philosophies in which we are encouraged to “follow the child” and explore using “the hundred languages of children“. This is where this next exploration came from: V’s interest in working on a project and exploring it through different materials.

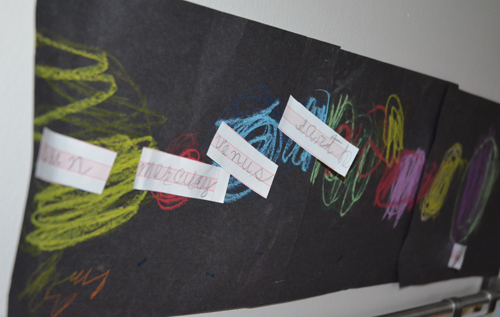
A few weeks ago V was telling me about a project some of her classmates had been working on at school. She decided that she wanted to work on it at home. She needed: black paper, pencil crayons, and play doh. The project subject: The Solar System.

Child-Led Solar System project, https://keepingcreativityalive.com

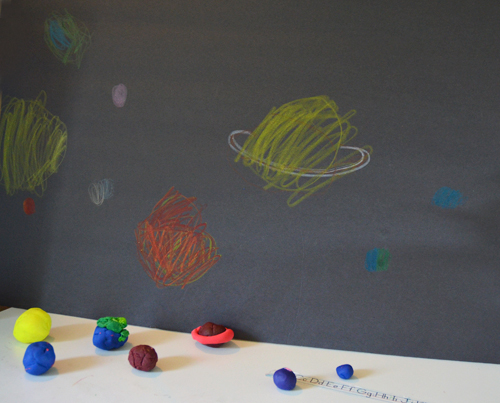
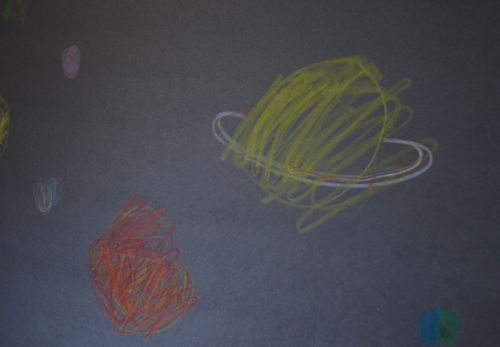
Her first task was to draw the planets. Referring to a Magic School Bus Space poster that we had, Violet started by drawing the sun, followed by colouring each planet in relation to it’s proximity from the sun all while carefully selecting colours that reflect the planet’s characteristics.

I’m not going to say she was all that careful about her drawing! At times I wanted to say “Slow down!” or “Colour more carefully” but I resisted critiquing and instead quickly became envious of her free flowing approach to drawing. I might have reminded her to make it a sphere or circle here or there… I couldn’t resist!

Child-Led Solar System project, https://keepingcreativityalive.com

As we went along we discussed some key characteristics of each planet:

Mercury: Lots of craters, Very hot and no water.

Venus: Clouds of deadly yellow poison called sulfuric acid. Covered with rocks.

Earth: Only planet in our solar system with oxygen and liquid water. Rocky planet.

Mars: The iron in soil makes the planet red. All water is frozen in polar ice caps.

Jupiter: Largest planet and has 16 moons. Made up mostly of gas.

Saturn: Surrounded by rings of ice, rock, and dust. Made up of gas.

Uranus: The gas methane makes the planet look blue-green. Travels around the sun on its side.

Neptune: Cold, dark, and blue. Strong wind.

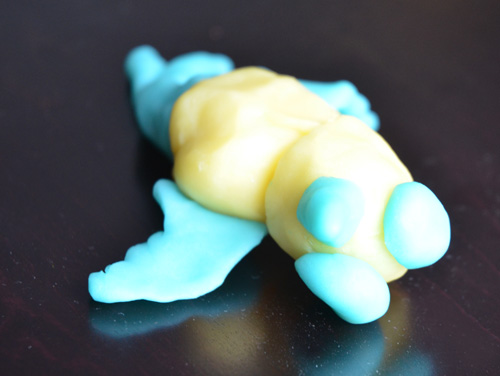
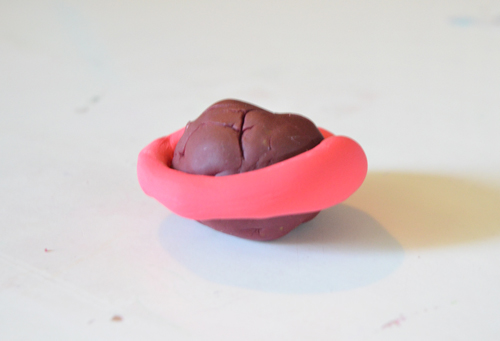
V went on to sculpt some of the planets as well as the sun and the moon. I went off to do something else and came back to Saturn…

Child-Led Solar System project, https://keepingcreativityalive.com

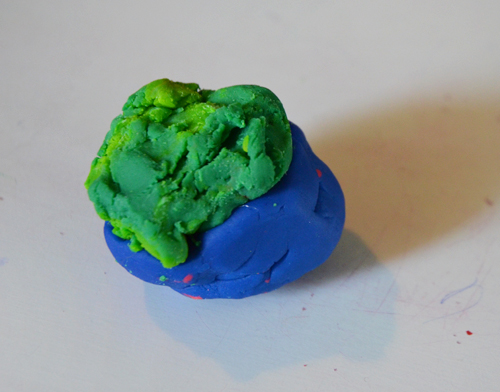
.. and Earth.. V: “The green is the grass and blue is the water.”

Child-Led Solar System project, https://keepingcreativityalive.comI’m not sure she ever completed every planet but she felt satisfied with her solar system exploration.

A few days later, V came home with her school solar system project! Goes to show that just because they’ve done it once doesn’t mean they can’t practice it again.. especially when the interest is there!

Child-Led Solar System project, https://keepingcreativityalive.com

Play Dough Creations!

Play-Doh Original Canister

If you make it they will come. And who knows what they will make out of it!? The “it” in this case is play dough and “they” are children!

Play dough is fun. It’s easy. It’s open ended. It’s for all ages. It’s therapeutic. It exercises the imagination. It practices fine motor skills. It feels good on the hands!

I have to admit that I have a nostalgic connection to store bought Play Doh. The smell alone brings me back to my childhood but I’ve been getting tired of seeing it dry out as the little containers are just not designed for little hands. Perhaps that was intentional.. so that they’d need adult assistance to open! They just don’t seem to get closed again!

In any case, I decided to finally look up some homemade play dough recipes and make our own. There are certainly no shortage of recipes found online! I went with DIY PLAYDOUGH found over at Modern Parents Messy Kids. The photos on this DIY post are fantastic and I thought the Jell-O ingredient was sort of interesting.

DIY Play Dough

The result was perfectly smooth and squishy dough with a nice fruity scent! It was actually quite easy to make apart from a little arm muscle action required to constantly stir the goop that eventually formed into a nice clump of dough.

Homemade Play Dough, https://keepingcreativityalive.com

We made two colours: blue and yellow. A little while later my five year old independently came up with her creation…

Homemade Play Dough Bird Mermaid, https://keepingcreativityalive.com

Watching the magic happen, ie. what children do with the dough, is like getting a glimpse into their little minds.


Homemade Play Dough Bird Mermaid, https://keepingcreativityalive.com

A bird – mermaid!

A day later another artistic project was underway. This time inspired by Monet. Yes, you read that right, Claude Monet. The night before we had read Katie Meets The Impressionists (worthy of a blog post of it’s own) which includes the work of Claude Monet. While at the library we picked up a children’s book about Monet that describes the large area of colourful brush strokes in his art. This is the page that undoubtedly inspired her next creation:

Claude Monet Book explanation of Impressionist Art

This is what she made:

Homemade Play Dough Art, https://keepingcreativityalive.com

How umm.. unique! Before I could say “tell me about this,” Violet announced “This is a gift for you Mommy!  It’s a globe in the style of Claude Monet. If you stand back it looks like the world.” – Brilliant!

For step by step directions on how to make the play dough, visit Modern Parents Messy Kids.

If you’re already familiar with the play dough making process, these are the ingredients you will need:

  • white flour – 1 cup
  • warm water – 1 cup
  • salt – 2 tbsp
  • cream of tartar – 2 tbsp
  • cooking oil – 2 tbsp
  • Jello – 1 3oz pack

Have fun and please share your little artists’ creations! What do your children like to do or make with play dough?

Open-ended Art

We’ve been all about open-ended art up until a recent trip to an art studio which has me thinking more about the value of both open ended art AND ‘art lessons’ or a more guided approach.  Here I want to talk about open ended art and reserve the ‘art lesson’ approach for a different post.

What is open-ended art anyway?

Open-ended art is having no expectations about the product; it’s all about the process. The focus then is not trying to achieve a predetermined outcome, but instead exploring materials and experimenting with the process of creation.  The final outcome might be based on an idea or it might be abstract.  Open ended art is all about free choice, discovery, problem solving and imagination!

“Art opportunities should be open-ended experiences, offered daily, so as to not stifle a child’s own creativity. Open-ended art is developmentally appropriate at all developmental levels and abilities. These opportunities build a child’s self-esteem, eagerness to learn, fine motor skills, and confidence!”   Source article.

The debate about open ended art versus lessons opens up a big discussion which has certainly been discussed at great length among art educators.  (This article over at Deep Space Sparkle discusses this topic from an art educator standpoint. The comments in that article are particularly insightful and exhibit the many varying viewpoints that exist.)  My goal here is to consider how, as a parent, I want to approach art making with my kids at home.

I’ll start with the top five PROS of open-ended art:

(I’ll tackle the pros of the ‘art lesson’ in another post)

  1. The child has the freedom to choose materials they are interested in exploring thus pretty well guaranteeing that the child will be engaged in the activity.
  2. The child comes up with the idea of what they will do (not restrained to working within limits that they may not like).  Again, keeping motivation high.
  3. Learning takes place as child experiments with materials in new ways. Discovering techniques and outcomes independently.
  4. Problem solving takes place as the child is deciding what to do next within the process. Having the freedom to adapt and making changes along the way.
  5. Child gains confidence from the pride of knowing that they created something by themselves! This in my opinion is all the pros wrapped up into the very best outcome!

What I’ve tended to do at home is provide arts and crafts materials and let V decide what she’s going to do with it.

Recently I put out watercolour paints and watercolour paper (along with some other random materials that she always has access to) imagining that she would make some sort of abstract drawings on the beautiful paper that we could later frame and put up around the house. Free original art! But she had a different idea. She pulled out a notepad and started painting whatever came to mind! For a while it was red stick figures…

I left her to create and she got really into this pattern of painting letters of the first initial of each of the names in our family along with a colourful pattern of stripes.

At times she got incredibly frustrated when the colours were blending because of too much water but with a quick little lesson on brush handing and some practice she learned to achieve what she was trying to accomplish. (I learned that there’s sometimes a time and place for a little lesson!)

The key learning for me in all of our open ended art explorations is that when the activity is guided by the child, the passion and inspiration is 100% there. Rashmie of Mommy Labs shares here experience in a blog post called Open-ended Art and Child-led Learning which includes this powerful quote:

A self-motivated soul can do wonders. There’s no limit to his/her creativity and passion.

It is through that post that I found Alissa at Creative with Kids’ fun tongue in cheek “10 Ways to Guarantee You Will Hate Doing Kids Crafts”. I can certainly relate to being guilty of a few items on this list! smirk

I’d love to hear your experiences with open-ended art in your home or classroom! What do you find works/doesn’t work?


Giving Thanks

We spent most of this past weekend at our family cottage enjoying the gorgeous colours of the fall on this wonderful Thanksgiving weekend.

Breathing in fresh air seems to awaken my creative spirit. I find that all I want to do is get creative when I’m up there. This time we decided to make place card stones to place on our table for the big dinner (inspired by The Artful Parent’s Thankful Stones).  We successfully played around with the project at home a couple of weeks ago…

… but this time our crayon colours came out too dark and it was too hard to read the names.

Right about the time that we were discovering that our project wasn’t working so great, my handy dad appeared with a piece of birch trunk and offered to cut it up into small discs that we could use for name cards for our Thanksgiving dinner table. He’s very creative! They worked out great!

In honour of giving thanks on this beautiful Thanksgiving weekend, I decided that we could use the extra birch pieces to play a fun game. This is how it worked:

When everyone arrived for dinner I asked each person to write or draw what they are thankful for on the piece of wood and secretly put it in this paper bag.

Once I had them all, I displayed them in the center of our table for all to enjoy during dinner.

At the end of our dinner we had fun reading the thankful words, drawings, and messages and guessing who they came from!

We had a blast guessing who wrote what. Some were obvious, others not so much! We all guessed wrong for “walks with mom and dad”. Turns out it was Archie’s, my brother’s dog!

Happy Thanksgiving to all that are celebrating today!

Makedo Project 1

The possibilities are really endless with these cardboard connectors! It was also the perfect activity to take to the cottage since there always seem to be boxes around and they come in a small cylinder container making it very easy to transport.

V is still too young to cut the boxes and actually poke the holes for the connectors but she directed the entire process! Surprise surprise!  It started as a zamboni… the amount of snow outside inspired that idea!

But then evolved into a fire truck.. inspired by the flame in the wood stove…

… then a sleigh…

Very very fun! What’s really cool about these very simple (I don’t even know what to call them…) doo dads is that it’s open ended and creates the opportunity for A LOT of play. It starts with the planning and gathering materials, then there’s building and problem solving and finally playing, playing and more playing. At which point it all starts all over again with decorating, adapting and playing in different ways.

Holiday Craft Exchange and Playdate

This is truly a brilliant idea. I can’t take credit but I’ve enjoyed participating in a holiday craft exchange for the second year in a row now.  Here’s what it is: a playdate where each Mom brings a simple holiday craft packaged and ready for as many kids that will be at the party. Ten seems to be a good number. Have some fun playing, have each mom explain what they brought and any special directions for the craft.. but the best part is going home with 10 different crafts that you can pull out on a snowy day. The result? Some fun and creativity with minimal effort in coming up with the craft AND instant gifts your child can give to a grandparent or relative that is uniquely made by your child.

And the proud result…

Art In The Park ~ Painting In The Park

Well, I have to say our first Art Group experience was a success! All of our little friends created masterpieces under the shade of the trees on this beautiful summer day. Every single child (6 in total) were immersed in painting for upwards of fifteen minutes. Not bad for 2 and 3 year olds! Did I mention there was a park complete with swings and slides within 100 meters? I was quite impressed and inspired watching the little hands mix colours and spread the paint so freely. We even had a little Jackson Pollack in the group!

I decided to keep the first Art Group activity straight-forward but added a little twist to give each child a personalized outcome to their artwork. I brought watercolour paper, tempera paints and brushes and palettes of course. But, I pre-cut the first initial to each child’s name using my handy Silhouette machine and contact paper.  The idea comes from this Watercolor Initials project. Unfortunately I don’t have the finished products as the artwork was too wet to peel the contact paper before our art date was over. I’ll have to see if I can get some photos of the final pieces.  But really, the fun (for me) is watching the kids create. It was a happy morning. I’m looking forward to the next one!

Art In The Park ~ Art Group Take 1

I’m very excited! I’ve organized an art group that is meeting for the first time tomorrow morning!! We’re gathering at our local Lakeside Park – the perfect inspiration for our little artists.  Looking forward to tracking our experiences here!

I must give credit to Jean at The Artful Parent for sharing her art group experiences and providing some of the inspiration it took me to finally get our group up and running. Thanks Jean!